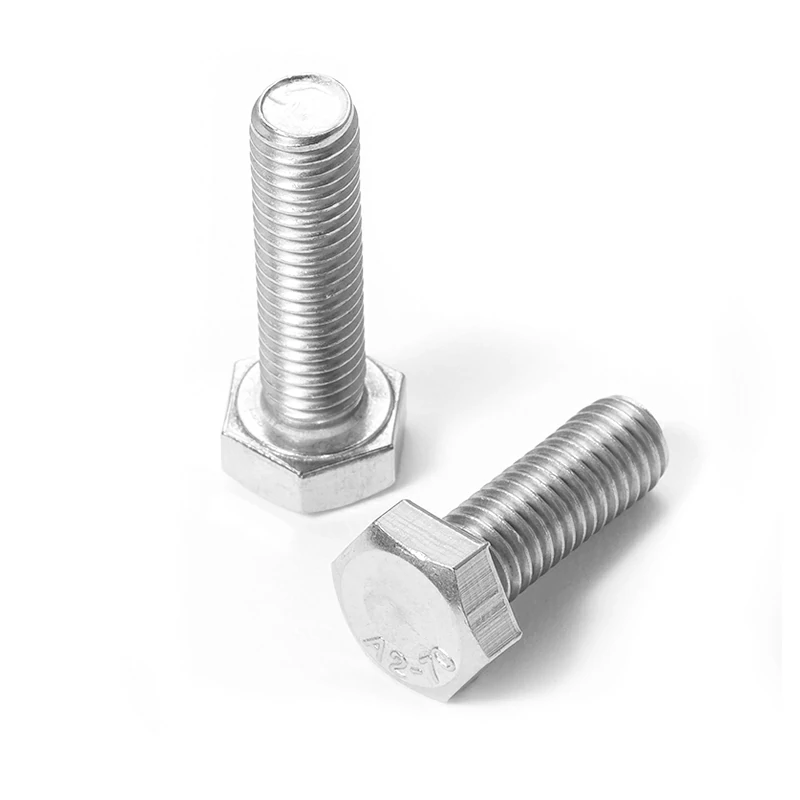
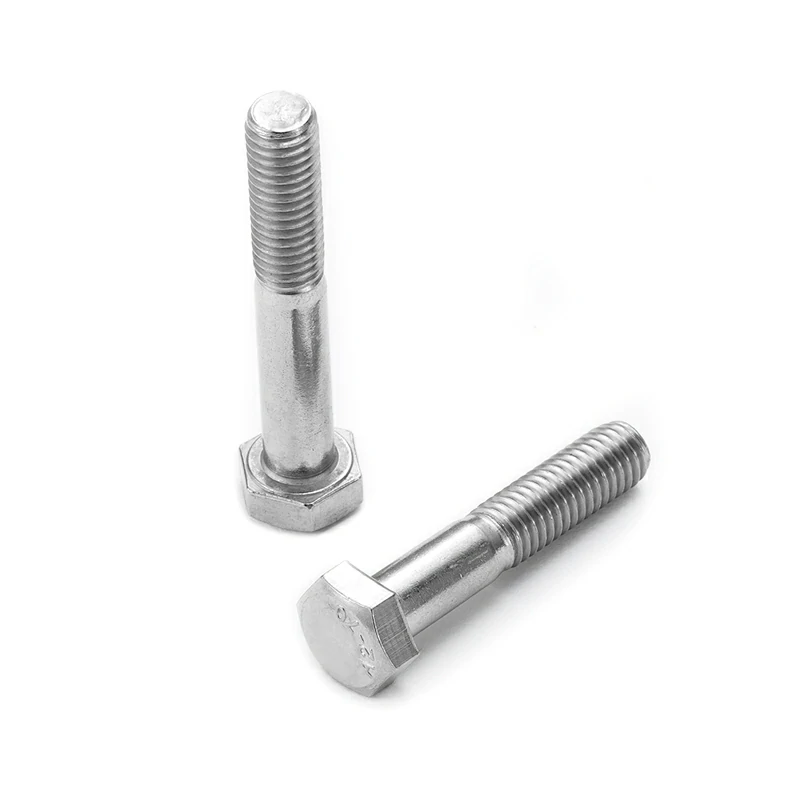
Stainless steel fasteners are widely used across construction, marine systems, industrial machinery, architectural projects, and outdoor installations due to their excellent corrosion resistance and durability. However, even high-quality fasteners can fail prematurely if they are installed incorrectly. The unique metallurgical properties that make stainless steel highly resistant to environmental degradation also require specific handling during assembly.
Many cases of stainless steel fastener failure are not caused by material defects, but by poor installation practices. Failing to adapt standard assembly techniques frequently results in improper stainless steel fastener installation, leading to loose joints, sheared heads, or structural damage. Understanding these common fastener installation errors helps engineers, contractors, and installers improve reliability, reduce maintenance costs, and extend service life.
This guide explains the most common installation errors, why they occur, and the best practices for installing stainless steel hardware correctly in industrial and outdoor applications.
Why Proper Fastener Installation Matters
Fasteners act as critical load-bearing components that maintain structural integrity and joint stability. Relying on improper techniques during Industrial Fastener Installation can lead to serious mechanical and structural risks, including:
- Joint loosening and reduced preload retention
- Thread seizure and permanent damage
- Accelerated corrosion and structural instability
Conversely, executing correct installation methods ensures a reliable clamp force, long-term corrosion resistance, improved vibration resistance, and safe operational performance.
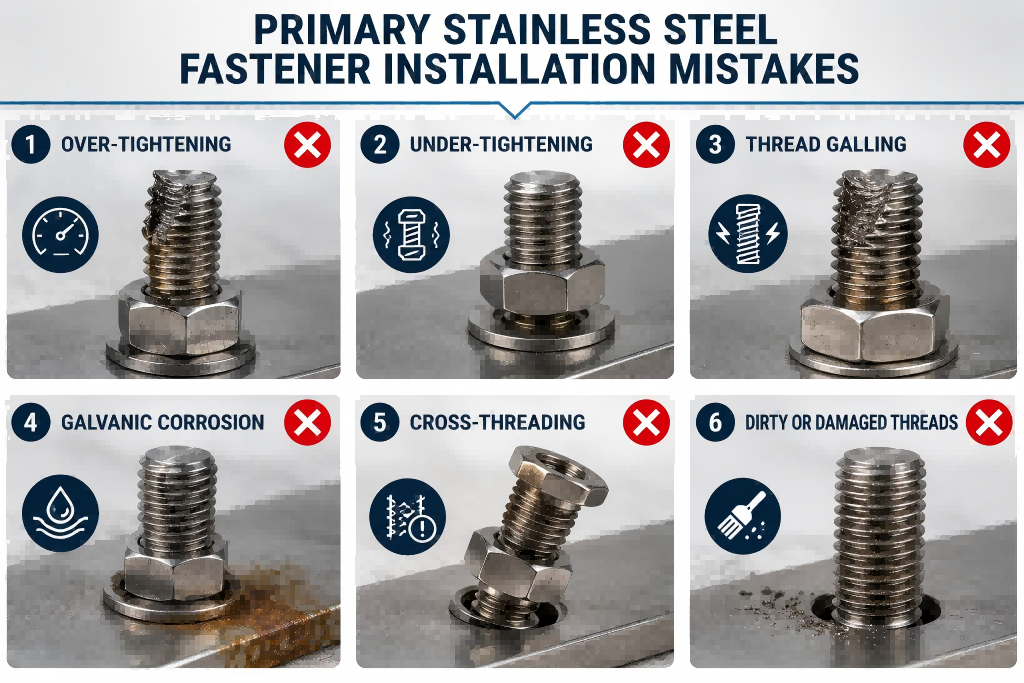
Primary Stainless Steel Fastener Installation Mistakes
1. Incorrect Torque on Stainless Steel Bolts
A widespread misconception in the field is that all metal hardware can be tightened using identical torque thresholds. Applying an incorrect torque on stainless steel bolts is a primary catalyst for joint failure.
- Over-Torqueing: Installers often assume tighter fasteners provide stronger joints. However, stainless steel is more ductile and generally has a lower yield strength than heat-treated carbon steel. Using high-torque impact guns causes the stainless steel bolt to stretch past its elastic limit. Signs of over-torqued hardware include visible necking (thinning) of the bolt shank, stripped threads, loss of preload, an increased galling risk, and fastener heads snapping clean off.
- Under-Torqueing: Conversely, under-tightening fails to develop the necessary preload (clamping tension) required to hold the joint secure under dynamic load conditions. This directly leads to joint movement, vibration loosening, leakage in sealed systems, and uneven load distribution.
Prevention Strategy: Always consult specific engineering torque charts calculated for the exact stainless steel alloy grade (e.g., 304 vs. 316). Utilize a calibrated manual torque wrench rather than relying on an uncalibrated pneumatic or impact tool to ensure precise target preload.
2. Fastener Thread Galling
Fastener Thread Galling is a form of cold welding that occurs when stainless steel threads seize during tightening. It stands as one of the most frequent, costly, and disruptive installation issues associated with stainless steel hardware.
- Why Galling Occurs: During tightening, intense friction and pressure cause the protective chromium oxide surface layer of the stainless steel to break down. The exposed metal asperities (microscopic high points) on the male and female threads shear against each other and lock together. Under continued driving force, the threads literally weld into a single solid mass.
- The Consequence: Once galling begins, the fastener cannot be tightened further or removed without seizing completely. This usually results in a sheared bolt or an assembly that must be cut apart entirely. Galling is heavily accelerated when fasteners are installed too quickly, fine threads are forced together, threads are dirty or damaged, or no lubrication is used.
Prevention Strategy: To reduce galling risk, apply a high-quality stainless steel anti-seize compound (such as a nickel-based or ceramic lubricant) to the threads before assembly to minimize friction. Additionally, controlling driving speed is mandatory; high-speed installation using impact drivers generates excessive heat. Installers should hand-start fasteners and run mechanical drivers at low speeds under 400 RPM.
3. Inducing Galvanic Corrosion Fasteners
A highly detrimental environmental mistake is mixing incompatible metals within a single joint assembly. This creates a classic Galvanic Corrosion Fasteners hazard when dissimilar metals contact each other in the presence of moisture or electrolytes.
- The Mechanism: When stainless steel is placed in direct contact with a more chemically active (anodic) metal, such as aluminum or structural carbon steel, a galvanic cell is formed in the presence of an electrolyte like rainwater or salt spray. The stainless steel acts as a cathode and drastically accelerates the corrosion rate of the surrounding anode metal.
- The Consequence: This interaction leads to surface discoloration, rust staining, accelerated metal deterioration, and reduced joint strength. The structural substrate surrounding the fastener degrades rapidly, leading to structural loosening and joint breakout, even though the stainless steel bolt itself remains completely rust-free.
Galvanic Corrosion Risk Level:
[ Stainless Steel + Aluminum ] ——-> High Risk (Sacrifices Aluminum)
[ Stainless Steel + Carbon Steel ] —> Moderate to High Risk (Sacrifices Carbon Steel)
[ Stainless Steel + Stainless Steel ] -> Fully Stable / Protected
Prevention Strategy: Adhere to strict material compatibility guidelines. If you must attach stainless steel to a dissimilar metal, physically isolate the components using non-conductive isolation materials, such as EPDM, nylon, or Teflon washers and sleeves, to break the electrical circuit.
4. Poor Thread Alignment and Cross-Threading
In fast-paced assembly environments, rushing through initial setup frequently results in cross-threading—a mechanical error where the male and female thread paths do not align correctly. Because stainless steel has high surface friction, forcing a cross-threaded bolt even slightly into a tapped hole or nut immediately triggers severe thread galling and total joint seizure. This leads to permanent thread damage, reduced load capacity, and an increased risk of overall fastener failure.
Prevention Strategy: Train installation crews to manually start all fasteners by hand for at least two to three full rotations before introducing any mechanical driving tools. If resistance is felt immediately, back the fastener out, check alignment, and clear any debris from the thread channels.
5. Using Dirty or Damaged Threads
Contaminated threads increase friction and installation difficulty.
Risks
- Galling
- Inaccurate torque readings
- Uneven preload distribution
- Prevention
Always:
- Inspect threads before installation
- Remove dirt, metal shavings, and coatings
- Verify clean thread engagement
Cleanliness is essential for reliable stainless steel fastener performance.
Common Fastener Installation Errors in Industrial Applications
Industrial systems place additional stress on fastening assemblies.
- Typical Installation Problems
- Uneven tightening sequences
- Improper washer selection
- Incorrect thread engagement
- Failure to consider thermal expansion
- Ignoring vibration loads
These issues frequently contribute to long-term improper stainless steel fastener installation failures in industrial environments.
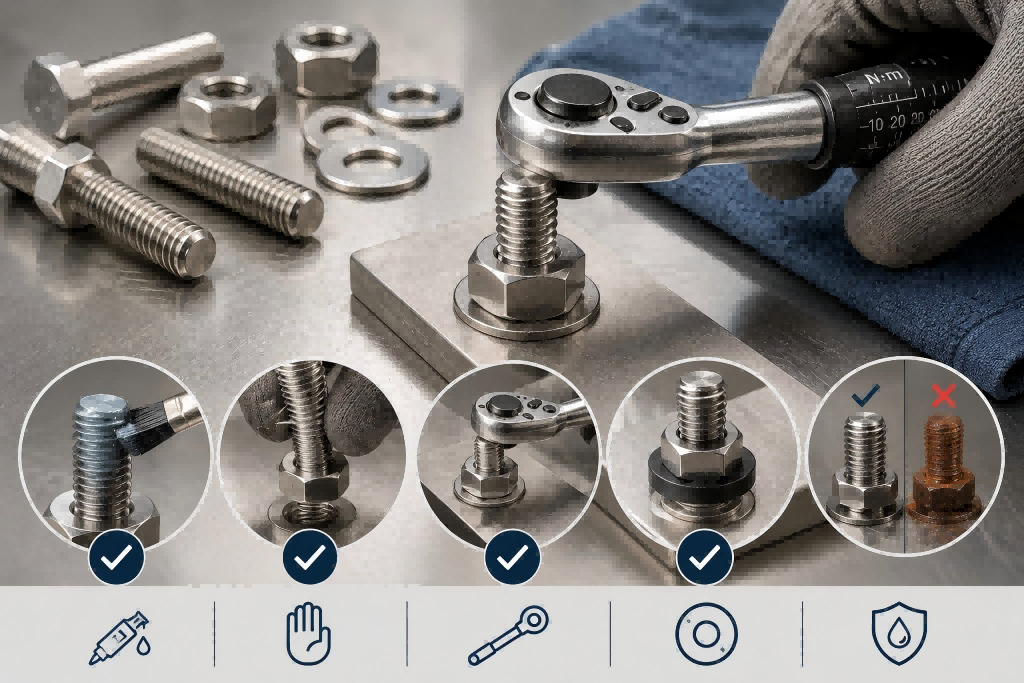
Best Practices for Installing Stainless Steel Hardware
To systematically eliminate installation errors and maximize the service life of industrial systems, assembly teams should follow these established best practices for installing stainless steel hardware:
- 1. Use Proper Lubrication: Treat all heavy-duty or high-load stainless steel threads with a dedicated anti-seize lubricant to reduce friction and prevent thread seizure.
- 2. Follow Torque Specifications: Never guess the tightening limit. Use precise installation torque values based on the specific fastener grade, size, and lubrication condition with calibrated torque tools.
- 3. Maintain Strict Cleanliness: Verify that both internal and external threads are completely free of dirt, metal shavings, and construction grit before assembly, as contaminated threads distort torque readings and cause galling.
- 4. Control Power Tool Speed: Run mechanical drivers at low speeds (under 400 RPM) to keep thermal generation to a minimum.
- 5. Isolate Dissimilar Substrates: Use protective, non-conductive washers and sleeves when fastening into aluminum or carbon steel to block galvanic action.
- 6. Select the Correct Fastener Grade: Ensure proper procurement by choosing 304 stainless steel for general applications and 316 stainless steel for marine, chemical, or highly corrosive environments.
Conclusion
Most stainless steel fastener installation mistakes can be completely avoided through proper torque control, lubrication, thread alignment, and material selection. Issues such as thread galling, incorrect torque application, and galvanic corrosion remain the leading causes of premature joint failure in industrial and outdoor applications. By following proven, systematic installation methods, engineers, contractors, and maintenance teams can dramatically improve operational safety, reduce unnecessary maintenance costs, and maximize the durability of the assembly.